INTRODUCTION
This is the accompanying background info for the setup-process that is integrated into Svalbard Audio's KLAR, the virtual monitor controller. The setup process guides you through integrating one or two subwoofers with your main monitors, since this is the most common use case. Feel free to experiment with different setups, measurement procedures and ways to use it though. KLAR is customisable, allows you to send measurements and settings to and from REW, and enables you to easily compare custom presets, so you can set it up the way you prefer.
You can do all measurements within KLAR, and KLAR can create all filters & settings for you automatically. But for more manual control, KLAR can also communicate directly with REW. You can send KLAR's measurements to REW with the push of a button, have KLAR create settings for you in REW, and after manual review or customisation, ask KLAR to retrieve the filter settings from REW.
The setup will link to the relevant chapters in this online setup with additional info. If you are a first time user, I'd advice you to do at least one complete measurement procedure completely within KLAR, to get a solid 'baseline' preset to compare the REW versions with.
KLAR is a standalone application so it can be be used in conjuction with any software that outputs audio.
Equipment needed:
Software :
- Svalbard Audio KLAR.
- (OPTIONAL) Latest Room EQ Wizard API BETA version (which includes the API component that is needed to communicate with KLAR).
Hardware:
- (Measurement) microphone (a mic stand is recommended). More info on selecting a suitable microphone.
- Subwoofer.
- Studio monitors.
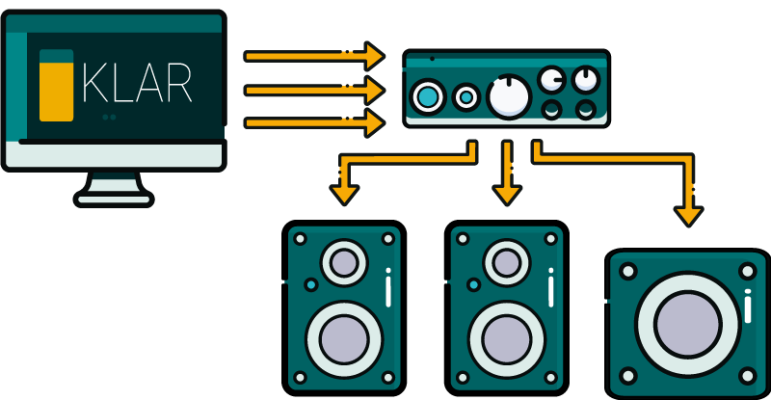
- Audio interface with separate outputs for monitors and subwoofer.
- Cables to connect it all.
- Computer with macOS or Windows.
1.
Install KLAR
Windows
a. Download the Windows installer (.exe) from svalbardaudio.com and install KLAR.
b. Click 'Run anyway' if Windows Defender shows a 'Windows protected your PC' message and follow the steps in the installer.
macOS
a. Download the macOS installer (.pkg) from svalbardaudio.com and install KLAR
b. Enter your password and follow the steps in the installer.
2.
Install REW (optional)
- Download the latest REW API Beta version* that's available from avnirvana.com. Depending on which OS you use and which exact REW version you installed, the screenshots on this site might look slightly different, but it should function the same.
- Install REW with the default options.
- Open REW and go to 'Preferences', under the 'REW' (Mac) or Preferences' (Windows) menu.
- Go to the 'API' tab.
- Click 'Start server' and make sure it says 'API server is running on port 4735'.
* Currently only the API beta version (NOT the regular beta versions) supports the use of the API that enables direct communication between KLAR and REW.
* on macOS to use the REW API with KLAR you need macOS Monterey or newer.
To open REW with the API server started automatically:
MacOS:
- Create a new application-shortcut by using Apple’s Script Editor (installed by default):
- Open ‘Script Editor’.
- Click ‘New Document’.
- Copy paste this command:
do shell script "/Applications/REW/REW.app/Contents/MacOS/JavaApplicationStub --args -api" - Click File > Export and choose ‘File Format’ : Application
- Pick a file name and location and click 'Save'.
Windows:
- Right click the REW icon and select 'Properties'
- Go to the 'Shortcut' tab
- Add -api to the target field, so it becomes e.g. C:Program FilesREWroomeqwizard.exe -api
1.
Connect monitors & subwoofer(s) to individual outputs:
Before you can start using KLAR you should make sure all your hardware is properly connected & set up. To be able to control your sub(s) and monitors independently, it is necessary to connect each to a separate output on your interface.
All volumes faders/knobs of the audio interface's outputs that you're going to use should be at 0dB. Please double check your interface's software mixer/control panel and/or hardware controls on your interface to make sure they are all at 0dB.
If you're worried about accidental excessive speaker volumes, you could consider lowering the volume controls on the monitors or subs themselves so the just can't play any louder than you deem necessary/healthy. Having a power switch nearby to turn off your monitors and/or amps can be another simple safeguard. Please check the note on gain staging (below) as well.
Each software/playback output should only go to the one corresponding hardware output. Also make sure the microphone input is not routed to any of the monitor outputs directly in your audio interface's mixer, to avoid feedback.
Own a hardware controller?
If you were previously using a stereo hardware monitor controller, you should disconnect it from now on and connect your monitors and subwoofer(s) directly to your audio interface. Because of this direct connection, you can process the signal going to each speaker differently and have full control over the response and timing. KLAR will replace (and probably add to) the other functions of your hardware controller, like setting (reference) volume levels and input switching and will have no analog colouration/distortion.
- Make sure you only connect the monitors to the hardware controller, not the sub.
- Make sure to either bypass the controller (if possible) or set it to a fixed, repeatable level when using KLAR.
- Beware of any signal degradation caused by the hardware controller. A direct connection from interface to speakers will almost always sound better.
2.
Connect a microphone
Select a suitable measurement microphone (click this link to learn more) and connect it to a microphone preamp on your audio interface. Make sure the cable is long enough to reach your monitors & sub.
3.
Disable all available processing features on your subwoofer
If your sub has any of the features listed below, please set them as suggested:
- Polarity : '0 'or 'OFF'.
- Phase: '0 'or 'OFF'.
- Lowpass (cutoff, crossover) frequency: highest frequency available or bypass. • EQ/contour: '0'or 'OFF'
- DSP: bypass as many settings as possible.
- Bass management: 'OFF'
- Low cut: '0' or 'OFF'
- Set the volume/gain/output level to its maximum settings. • Settings related to satellite/highpass are not relevant since the monitors will not be connected to the sub.
4.
Adjust these settings (if available) on your monitors
- EQ/Frequency controls (bass/treble/high/contour): '0, 'OFF' or 'Bypass'.
- DIsable room compensation/boundary correction/acoustic space EQ by setting: '0 ', 'OFF' , 'WHOLE/FULL SPACE' or 'FREE FIELD', depending on the make & model.
- DSP: bypass as many settings as possible.
- Set the volume/gain/output level to it's maximum settings (this might change in a later step).
- High pass: 'OFF' or 'Bypass'.
5.
Enable loopback
A loopback is a way to route audio from an output back to an input. Basically it is ,or functions like, a cable that's connected from an output directly to an input.
The loopback will enable you to playback sounds from any application (DAW, streaming platform, browser, other audio application, etc) and route the audio back into KLAR.
There are three options:
- Route an actual cable from a physical output (this will be called the loopback output) to a physical input (which we'll call the loopback input). Simple as that. A cable that sends all audio that goes out of your interface directly back in. Make sure the mixer of your audio interface doesn't send this input to the corresponding output, to avoid feedback. A digital input/output would be the best option, cause it will, for example, enable bit-accurate recording of reference tracks in your DAW, but an analog input/output would work fine too.
- Use your audio interface's loopback functionality. If available (check the manual), there will be either a dedicated loopback input available, for instance with most Focusrite interface. An other approach (used in eg RME) is where an output can be selected as the loopback output, which will turn the corresponding input into a loopback input. So if you enable loopback on output 8, input 8 will receive all audio that you send to output 8 (as if a cable was connected from output 8 to input 8).
- Software loopback. There are several software loopback drivers available. In the software you want to play audio from you set this 'virtual loopback driver' as the output. in KLAR you should select the same driver as the input.On macOS a good option is Blackhole..On Windows I have not found a reliable solution yet.If you're using software loopback, you should select this loopback as the input device later using 'Options > change audio device settings' and select its inputs using 'Options > edit inputs'. For now, when your using KLAR to do measurements, you need your the same audio interface your speakers ad sub are connected to as the input device, and your measurement microphone should be connected to that interface as well.
Gain staging
Integrated automatic setup procedure
You have now completed all necessary setup steps before starting the actual measurement procedure. All steps below will be linked to from within the measurement procedure and are only needed if you want to do some of the analyzing or filter creation in REW manually. So please switch back to KLAR now and start the setup procedure.
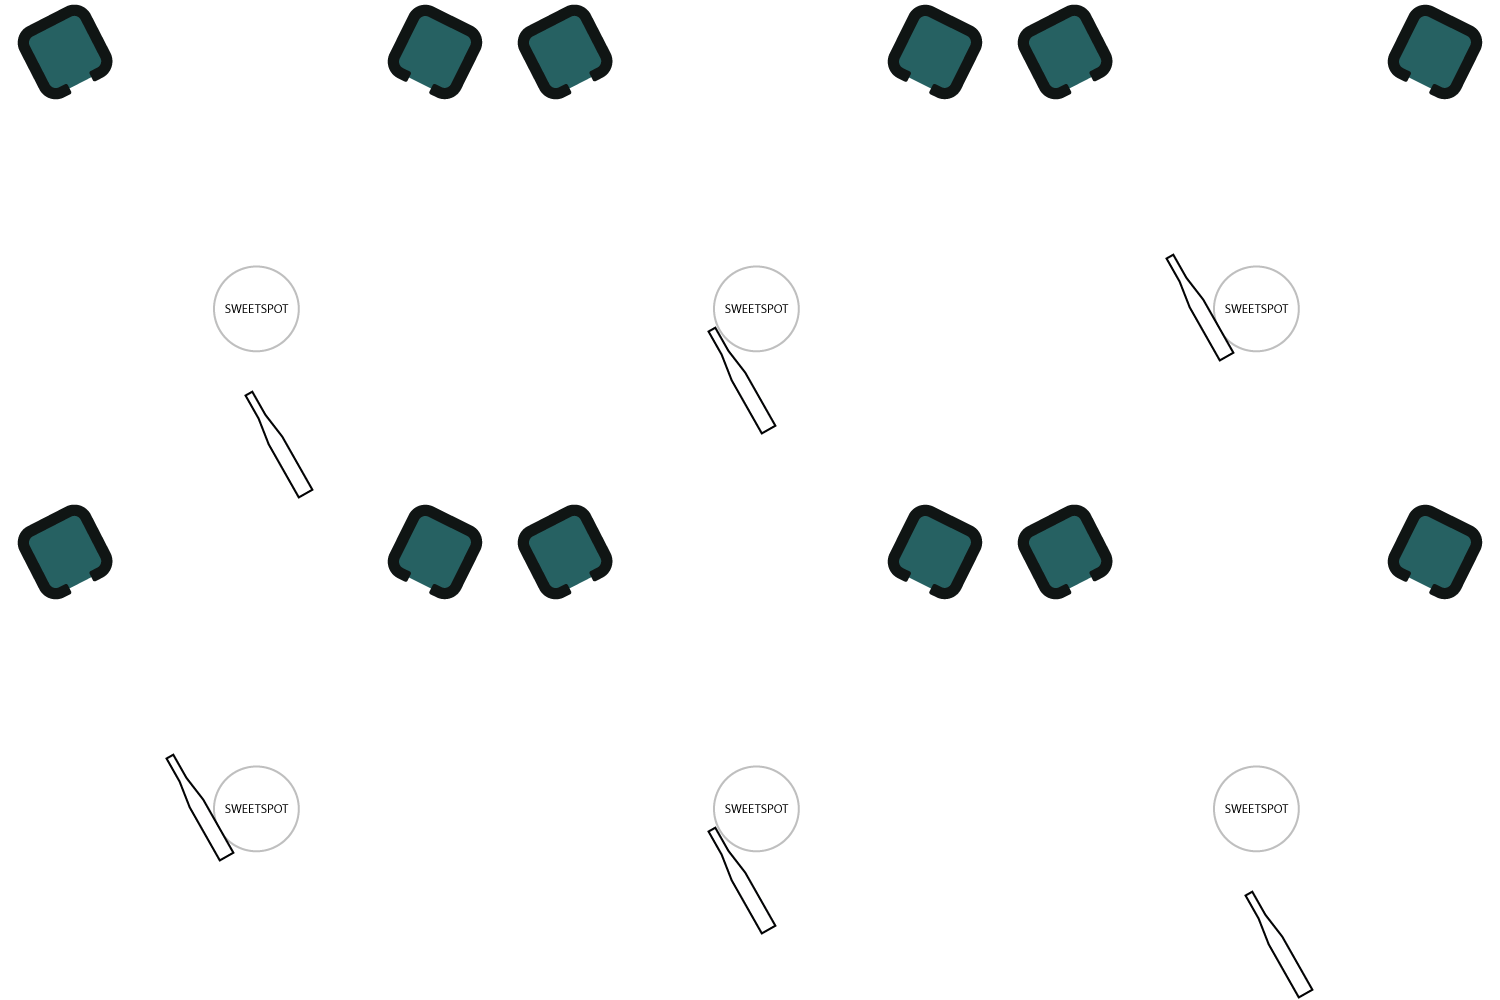
Subwoofer locations
Subwoofer locations (optional)
- Click 'Send to REW' to import all subwoofer location measurements in REW.
- Click the 'All SPL' button above the graph to view all measurements simultaneously.
- Click 10...200 in the bottom right corner to zoom in on the bass frequency range.
- Select a measurement of interest in the left colum.
- Try to identify the location with the smoothest response and/or the least amount of dips in the response. Peaks can usually be corrected with EQ, but dips (especially narrow ones) often correspond with a room-mode null and can't be fixed with EQ.
- Once you've identified the best location, move your sub there.
- Go to File > Save all measurements and choose a location and file name to save all subwoofer location measurements for future reference.
- Click 'Remove all' to start with a clean slate for the next step. If you've got two subs, the results will be valid for both, just pick the best and the single best location.
Roll-off measurement
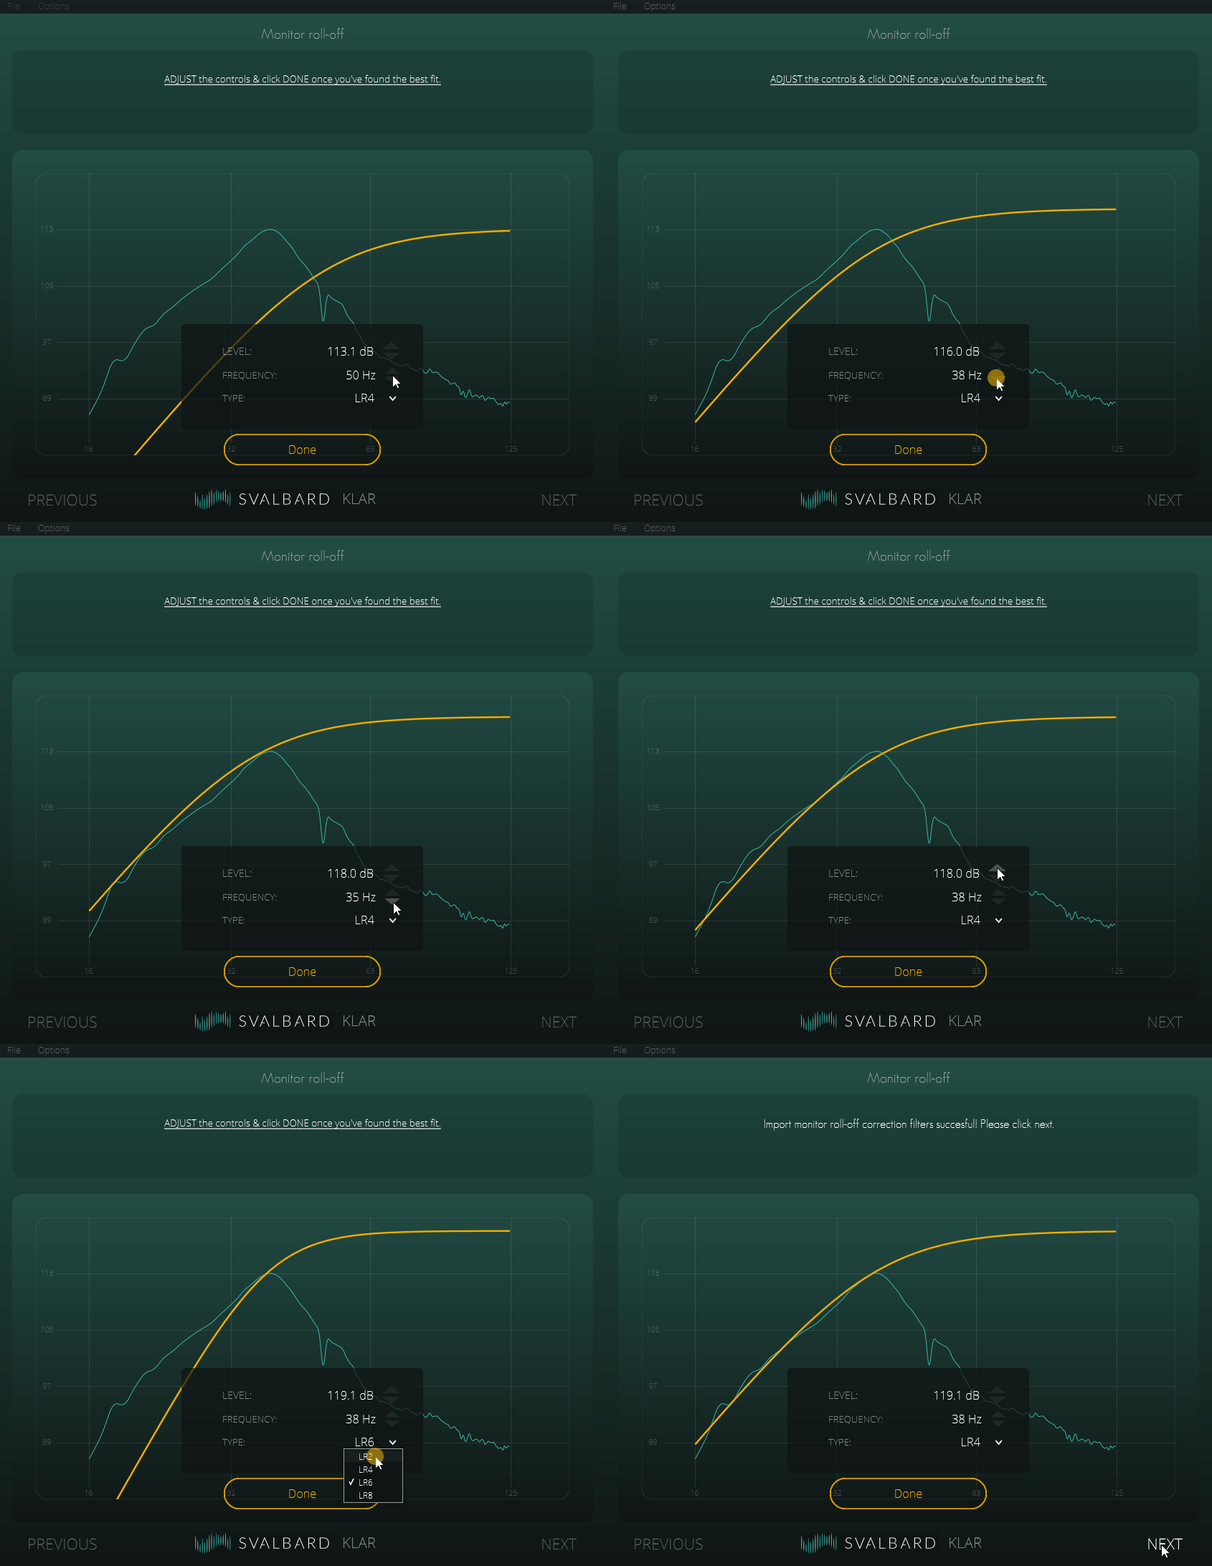
The roll-off measurement is used to determine the current roll-off. Once you've analysed it in the next step, a filter will be applied automatically to 'flatten' the roll-off so it won't interfere with KLAR's crossover. Read the background info below if you want to know more.
Fixing Polarity issues
If KLAR warns you that the polarity of one of your monitors or subs appears to reversed, try to find the cause of the reversal by changing potential causes one by one, and remeasuring after each change:
- Check to see if you your monitor or sub has a polarity switch that's accidentally engaged.
- Try a different cable.
- Check if the software of your audio interface has a polarity button on the corresponding output channel.
- Polarity switches are sometimes labelled 'Phase'.
Measure the on-axis response of the mid & high frequencies
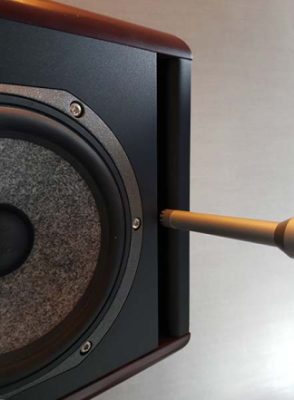
Without the availability of an anechoic (reflection free) chamber, the easiest way to get a result that resembles the anechoic version is using the on-axis moving microphone measurement (MMM). By moving the microphone on the axis of the tweeter you take a spatial average that filters out most of the reflections. You can only capture the frequency response / amplitude, phase information won't be captured.
To perform a 'Moving Microphone Measurement' :
- Hold the microphone in your hand at the sweetspot. Try to keep your body away from the microphone as much as possible to avoid reflections. Keep it at ear height. If you speakers are properly setup, this should be approxiately the same height as the tweeter.
- Press 'measure' and hold the mic approx 25 cm behind the sweetspot, aimed at the tweeter.
- When the noise starts playing, slowly move approx 50cm, in a straight line, towards and from the tweeter. Keeping doing this during the 15 seconds the recording takes.
Creating filters for the mid & high frequencies
Create REW filters to correct the room influences
As an alternative to KLAR's automatic calculation of the 'room correction' filters, you can create them in REW. KLAR will automatically adjust the target settings within REW's EQ menu for each speaker. When creating or adjusting filters. aim for a predicted response that matches this target as closely as possible (more info in the background section below).
- Selected the 'average' measurement you want to create filters for by clicking on it on in the left column.
- Click the 'EQ' button on the top.
- The 'Predicted' graph (on the left of the EQ window that pops up) is the estimated response including the filters REW just calculated for you. Click the 10-200 button in the bottom right corner to zoom in on the area of interest.
- The numbers of above the graph correspond with the number of the filter that REW calculated.
- Sometimes no further action is needed, but if you feel the response could be smoother, click 'EQ filters' on the top to add or edit filters manually. If you want to try filling in dips in the response (some of them can be corrected, others can't), this is the best step to try this.
- Please read the background info on 'Minimum phase' (below, in yellow).
- If you spot filters whose gain is larger than -20dB, remove those.
- If you spot filters that boost & cut at nearly the same frequency (within a few Hz) you should remove those too.
- Deviations above 200Hz should be ignored for now. This step sometimes needs multiple tries to find the optimal results. - Once you're happy with the way the predicted curve looks, go back to KLAR and click 'Import REW' to send all created filters for monitors and subwoofer(s) from REW to KLAR.
(For older versions: Click 'Controls' in the top right corner > 'Generate minimum phase' > 'Generate and close'.}
Group delay is the delay specified for each frequency. The 'excess' part refers to the delay that's in excess of the delay that's inherent to a minimum phase system.
Calculate delays in REW
As an alternative to calculating the delays within KLAR, KLAR can instruct REW to perform the calculations.
-
Click 'Calculate in REW' to import the phase measurements in REW.
-
KLAR will automatically calculate the delays that lead to the best phase alignment. Usually there's no need to change any of the settings, and KLAR will tell REW how to perform the calculations and automatically import the calculated delays back in to KLAR.
- The estimated response after applying the delays in KLAR will be added as the 'aligned sum' of both subwoofers (if you have 2) and the monitor + subwoofer(s) combined.
- The calculated delay(s) will automatically be imported into KLAR.
If you want more control you can manually adjust the settings (mainly delay & polarity), see the alignment procedures described below for more info.
Alignment procedure
- Click the 'Actions' button (or 'Controls' if you're using an older version) in the top right corner and then click 'Alignment tool'.
- In the drop-down menus at the left, select 'Subwoofer 1 - phase' for the top one and 'Subwoofer 2 - phase' for the bottom one.
- Click in the ' All SPL' frequency graph so the 'cross-sign' & corresponding vertical line are placed at approx 85Hz (may deviate a few decimals). The horizontal part of the line is not relevant.
- Click 'Align Phase at Cursor' to calculate the delay for the phase to match at the frequency the cursor is placed.
- The overlayed frequency response curve shows the predicted response with this delay setting. You can also try selecting the 'Invert polarity' box (within the alignment tool window) of subwoofer 2, to find out if this leads to a flatter curve and/or a smaller delay value. You can also try if setting the vertical line to a lower frequency (eg 50Hz instead of 85Hz) leads to a better result.
- Click 'Aligned Sum' (bottom right corner) and rename the new simulated measurement that appears at the left to 'Subwoofer - phase'.
- Click the 'Actions' button (or 'Controls' if you're using an older version) in the top right corner and then click 'Alignment tool'.
- In the drop-down menus at the left, select 'Subwoofer - phase' for the top one and 'Monitor - phase' for the bottom one.
- Click in the ' All SPL' frequency graph so the 'cross-sign' & corresponding vertical line are placed at approx 85Hz (may deviate a few decimals). The horizontal part of the line is not relevant.
- Click 'Align Phase at Cursor' to calculate the delay for the phase to match at the frequency the cursor is placed.
- The overlayed frequency response curve shows the predicted response with this delay setting. You can also try selecting the 'Invert polarity' box (within the alignment tool window) of the subwoofer, to find out if this leads to a flatter curve and/or a smaller delay value.
- Click 'Aligned sum' to create a new simulated measurement with the delay & polarity values added in the notes section.
Create filters for complete system low-end correction
- Click 'Send to REW' to send the measurements to REW.
- KLAR will instruct REW to calculate the filters to perform the final corrections on the combined (= monitors + sub(s)) low-end response.
-
Select the last measurement on the left and click the 'EQ' icon in the top area.
- The 'Predicted' graph on the left is the estimated response including the filters REW just calculated for you. Click the 10-200 button in the bottom right corner to zoom in on the area of interest.
- The numbers of above the graph correspond with the number of the filter that REW calculated.
- Click 'EQ filters' on the top to edit the filters if you feel the response could be smoother. Filters below 30Hz with gains larger than -20dB should always be removed, cause these are probably cause by background noise. If you spot filters that boost & cut at nearly the same frequency (within a few Hz) you should remove those too. To find out whether a dip is correctable with EQ, check if it's response is minimum-phase.
- Once you're happy with the way the predicted curve looks, go back to KLAR and click 'Import REW' to import the filtersettings from REW to KLAR.
Adjustments to taste - target curve
Decades of blind listening test have shown that listeners prefer a flat on-axis (the direct sound coming from your monitors) response. But depending on your personal preference, listening levels and the reflectiveness of your room combined with the way your speakers radiate sound into the room (directivity) a low shelf to boost the boost low frequencies and/or a slight tilt of the complete frequency range might sound best to you. Some amount of low-shelfing is almost always preferred, so this is implemented in the target curve that's activated by default. Try listening to some reference tracks you know well and try to judge whether the overall impression is too bright and/or bass-shy, and gradually adjust the target curve EQ setting accordingly. Try to listen at the volume you normally work at. How to change the target curve in KLAR:- In KLAR go to the 'Monitor editor' (click the icon directly right to the 'MON + SUB' preset).
- Click on the Target Curve default' EQ node.
- The 'Target curve default' preset gets activated when you switch to the main screen for the first time, it is not active during measurement. You try out different presets by clicking on the arrow to the right of the 'Target curve default' name and/or you can change the eq settings manually.
- To easily compare different settings you can create or duplicate presets by using the bottom right icon to go to the 'Preset manager' screen.
- Compare different 'house curve' EQ settings
- With or without room correction for mid and/or high frequencies.
- Different settings for different locations
- Different crossover points (might have to change room correction)
- Mix tools > mono > Swap left & right channels > Limited frequency range ('the flat auratone') > Smile curve ('edge case EQ')


